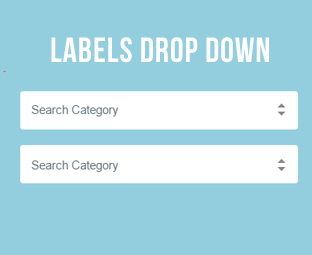
In the past, we have shown you how to display labels in Blogger, How to style Labels in Blogger and How to Rename Labels in Blogger. Recently, one of our users asked us about How to create Labels Drop Down Menu in Blogger. If your blog has a lot of labels, then showing a Label widget in your sidebar would take a lot of space. Therefore, a Label or category drop Down menu will easily hold more than hundreds of labels without taking a large space. In this article, we will show you how to create labels drop down menu in Blogger.
We hope this tutorial has helped you in learning how to create labels drop down menu in Blogger. If you like this post, please share your thoughts in the comments section below.
Why to Use Labels Drop Down Menu:
You might have used the default Label widget provided by Blogger but if you have a lot of labels, then it would take a lot of space on your blog. Therefore, it will make your blog look unprofessional and untidy at the same time.
The main purpose of using labels drop down menu is to save your blog space and make your blog look more professional and presentable. Therefore, if you want to add Label drop down menu in Blogger follow the tutorial below.
Create Labels Drop Down Menu in Blogger:
- The very first thing you need to do is to Add a Labels Widget to your blog (If you have not added already). We'll convert the default Label widget into a Drop Down Menu. Hint: (Go to Blogger >> Template >> Layout >> Add a Gadget >> Labels).
- After adding the Labels widget, you need to add CSS codes to your Blogger template. Therefore, Go to Blogger >> Template >> Edit HTML and search for skin tag. After finding the skin tag, just above it paste the following code:
- The next thing we'll be doing is to add HTML codes to your template so labels can function as drop down menu. In your template, search for this:
- Now replace the above code with the following code:
/* Dropdown Label */
.dropmedown select {
outline: none;
cursor: pointer
}
.dropmedown {
display: inline-block;
position: relative;
overflow: hidden;
width: 100%;
background: #fff;
border: 1px solid transparent;
border-radius: 3px;
height: 36px;
line-height: 36px;
color: #444
}
.dropmedown:before,
.dropmedown:after {
content: '';
position: absolute;
z-index: 2;
top: 13px;
right: 12px;
width: 0;
height: 0;
line-height: 36px;
border: 4px dashed;
border-color: #888 transparent;
pointer-events: none
}
.dropmedown:before {
border-bottom-style: solid;
border-top: none
}
.dropmedown:after {
margin-top: 8px;
border-top-style: solid;
border-bottom: none
}
.dropdown-select {
position: relative;
width: 100%;
margin: 0;
padding: 6px 8px 6px 10px;
height: 36px;
line-height: 18px;
font-size: 12px;
color: #62717a;
text-shadow: 0 1px #fff;
background: #f2f2f2;
background: rgba(0, 0, 0, 0)!important;
border: 0;
border-radius: 0;
-webkit-appearance: none
}
.dropdown-select>option {
margin: 3px;
padding: 6px 8px;
text-shadow: none;
background: #f8f8f8;
outline: none;
border: 0;
border-radius: 3px;
cursor: pointer
}
<ul>
<b:loop values='data:labels' var='label'>
<li>
<b:if cond='data:blog.url == data:label.url'>
<data:label.name/>
<b:else/>
<a expr:href='data:label.url'>
<data:label.name/>
</a>
</b:if>
(
<data:label.count/>)
</li>
</b:loop>
</ul>
<div class="dropmedown">
<select class="dropdown-select" onchange='location=this.options[this.selectedIndex].value;'>
<option> Search Category </option>
<b:loop values='data:labels' var='label'>
<option expr:value='data:label.url'>
<data:label.name/> (
<data:label.count/>)
</option>
</b:loop>
</select>
</div>
5. Once everything is done, press "Save Template" to complete.
We hope this tutorial has helped you in learning how to create labels drop down menu in Blogger. If you like this post, please share your thoughts in the comments section below.


0 Comments